Sunday, December 23, 2018

d365FO - Expired certificates issue (ExpiredCertificateException)

I found the issue in my local dev VM. After researched, there are 2 useful solutions I post here as references. Thanks Maha Jamali and Volker Deuss for great post here!

Expired certification issue on development machines

Fix Certificate Issues on Development Machines
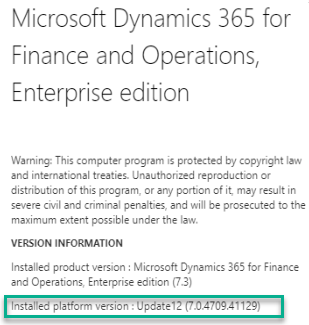

Issue/symptom
After running smoothly for long time. One day I got the below message while trying to connect to d365FO.


Analysis
There are many reasons possible for the above message, so the fastest way would be to look at Event Viewer. From below figure, it shows the reason of ExpiredCertificateException with the expired certicate id.


Solution
For this case, we can replicate the expired certificates and set the new expiration period on the new one. The steps are here.

1) Launch "Manage computer certificates"


2) Find the expired certificates. In this case, we need to changes the 4 certificates in the below figure.

3) Double-click on a expired certificate, then copy the thumbprint value.


4) Replicate the certificate with windows power shell (run as admin).

Paste these commands.

Set-Location -Path "cert:\LocalMachine\My"
$OldCert = (Get-ChildItem -Path 4C82C05E452D08A2BE1CC4F92DA24CF98E493F1D)
New-SelfSignedCertificate -CloneCert $OldCert -NotAfter (Get-Date).AddMonths(999)

And then copy or save the new thumbprint value.

B21B106BA4E0F7B090BEA027529C4D2E8D63F281


5) Refresh the "Manage computer certificates" again, then you see the replicated one.


6) Replace the old thumbprint with the new created on the files in  C:/AOSService/webroot


7) Repeat step 3-6 for the rest expired certificates.

8) Finally, reboot the VM. After restarted, wait until all related services are running, then connect to d365FO again.


Thanks for reading. Until the next post!

Friday, November 23, 2018

X++ | d365FO - create temp file and save to local drive

Hi, this post shows a very simple sample how to create a temp file, and then save it to local drive.

 class Job_CreateTempFile  
 {      
   public static void main(Args _args)  
   {   
     str filePath,  
         filePathAndName,  
         fileContent = "01234567890123456789";  
     ;  
     // prepare file name  
     filePath = System.IO.Path::GetTempPath();  
     filePathAndName = filePath + 'f' + guid2str(newGuid()) + '.txt';  
     // Save file  
     File::SendStringAsFileToUser(fileContent, filePathAndName);  
     info(filePath);  
     info(filePathAndName);  
     info("done");  
   }  
 }  

The result looks like these below figures. The file path and name are generated, then save automatically on the folder. However you will see that it was saved on the download folder. So this code is not 100% completed, but would give some picture about this kind of task.


Until the next post!

Monday, November 19, 2018

X++ | d365FO - Create a lookup with a table fields list

This post shows the same scenario with this X++ | ax 2012 - Create a lookup with a table fields list but now in version d365FO.

First of all, I would give all references I did research for this purpose here. Many thanks and really appreciate for all these post!!
http://dev.goshoom.net/en/2016/02/utilelements-in-ax-7/
http://dev.goshoom.net/en/2016/11/new-metadata-api/
AX7 Get information about table extension using Microsoft.Dynamics.Ax.Xpp.MetadataSupport
http://theinfolog.com/creating-a-lookup-to-aot-objects/

Scenario
Again, we have a table, for example SalesTable. Then we would like to create a lookup with all fields from that table. Now, this is a way we can do in d365FO.

Solution

In this version, we cannot use Utilelements table anymore, so the steps will be like this.

1. Create a temp (InMemory) table, YourFieldNameTemp. In this case, there is only one field name "Name" in it.

2. Add a static method as follows. You will note that _tblName is the name of table we want its fields name.

 using Microsoft.Dynamics.AX.Metadata.MetaModel;  
 public class YourFieldNameTemp extends common  
 {  
   public static YourFieldNameTemp populate(TableName _tblName)  
   {  
     YourFieldNameTemp yourFieldNameTemp;  
     //AxTable table = Microsoft.Dynamics.Ax.Xpp.MetadataSupport::GetTable(tableStr(SalesTable));  
     AxTable table = Microsoft.Dynamics.Ax.Xpp.MetadataSupport::GetTable(_tblName);  
     var fields = table.Fields;  
     var fieldEnumerator = fields.GetEnumerator();  
     while (fieldEnumerator.MoveNext())  
     {  
       yourFieldNameTemp.initValue();  
       AxTableField field = fieldEnumerator.Current;  
       yourFieldNameTemp.Name = field.Name;  
       yourFieldNameTemp.insert();  
     }  
     return yourFieldNameTemp;  
   }  
 }  


3. The same as ax 2012, you have a field and already override "Lookup" method.


In the Lookup method, put this below code.

   [Control("String")]  
   class YourFormStringControl  
   {  
     public void lookup()  
     {  
       YourExampleTable.lookupTableField(this);  
     }  
   }  

4. At YourExampleTable table, insert this below method. You will note that the name of table we'd like to get all lists is from ..(this.refTableName).  You can change it to fit your need.

   public void lookupTableField(FormStringControl _control)  
   {  
     SysTableLookup           lookup;  
     QueryBuildDataSource qbds;  
     Query q = new Query();  
     qbds = q.addDataSource(tableNum(YourFieldNameTemp));  
     lookup = SysTableLookup::newParameters(tableNum(YourFieldNameTemp),  
                         _control,  
                         true);  
     lookup.addLookupField(fieldnum(YourFieldNameTemp, Name), true);  
     lookup.parmQuery(q);  
     lookup.parmTmpBuffer(YourFieldNameTemp::populate(this.refTableName));  
     lookup.performFormLookup();  
   }  


That's all.

Thanks for reading and until the next post!

X++ | ax 2012 - Create a lookup with a table fields list

Scenario
Let's say we have a table, for example SalesTable. Then we would like to create a lookup with all fields from that table. This below is a simple way we can do in ax 2012.

Solution
So you have a field with lookup (override) method as follows.


In the lookup method, put this below code.

 public void lookup()  
 {  
 ;  
   YourExampleTable.lookupTableField(this);  
 }  

At YourExampleTable table, insert this below method. You will note that the name of table we'd like to get all lists is from ..tableName2id(this.refTableName).  You can change it to fit your need.

 public void lookupTableField(FormControl _formControl)  
 {  
   SysTableLookup sysTableLookup = SysTableLookup::newParameters(Tablenum(Utilelements),_formControl);  
   Query query = new Query();  
   QueryBuildDataSource qbd;  
 ;  
   SysTableLookup.addLookupfield(fieldnum(Utilelements,name));  
   qbd = query.addDataSource(Tablenum(Utilelements));  
   qbd.addRange(fieldnum(Utilelements,RecordType)).value(queryvalue(UtilelementType::TableField));  
   qbd.addRange(fieldnum(Utilelements,ParentId)).value(queryvalue(tableName2id(this.refTableName)));  
   sysTableLookup.parmQuery(query);  
   systableLookup.performFormLookup();  
 }  


That's all!

Wednesday, November 14, 2018

d365FO - how to apply platform update on local VM dev machine

This post shows the actual steps I did when applying the platform update of d365FO on the local VM dev machine (onebox).

Scenario

The onebox contains the version 7.3 platform update 12, and now it's time to update to the latest platform 20.

*** Remark before process

The main reference is Install deployable packages from the command line however only the following parts.


For whatever reason (which I don't know it yet), this topic doesn't work. Install an application (AOT) deployable package on a development environment


Step-by-step

1. This is the current version before changing.


2. Go to LCS website, and download the "platform update" deployable package.


3. Then we got the zip file.


4. Move the file to the non-user folder of the server (for example, avoid to move the file to C:\Users\UserABC\Desktop), then unblock the file.


5. Unzip the file


6. Edit file DefaultTopologyData.xml by put your server name and AOT model name.


7. Run the following commands (see the result of each too, not run all in one step). Please note runbookid and runbookfile are able to be renamed.

 AXUpdateInstaller.exe generate -runbookid="PLATFORM20-runbook" -topologyfile="DefaultTopologyData.xml" -servicemodelfile="DefaultServiceModelData.xml" -runbookfile="PLATFORM20-runbook.xml"  
 AXUpdateInstaller.exe import -runbookfile="PLATFORM20-runbook.xml"  
 AXUpdateInstaller.exe execute -runbookid="PLATFORM20-runbook"  
 AXUpdateInstaller.exe export -runbookid="PLATFORM20-runbook" -runbookfile="PLATFORM20-runbook.xml"  

You will note "AXUpdateInstaller.exe execute" step can take 45 minutes or more as well.

8. At the end of  "AXUpdateInstaller.exe execute". If things run well, then you got this windows. ; )


9. Finally, the platform is updated!


Don't forget to compile all code and DB-sync again to check the conflicts might have.


Until the next post!


Tuesday, November 6, 2018

X++ | d365FO - import and export data via XML (Part 2 - Import)

From part 1 X++ | d365FO - import and export data via XML (Part 1 - Export). Now assume that we are on the test system with the exported file 'TestTblParm.xml'.

Before the next step, delete all records on the test table, then you can be sure the new insert lines come from the importing code.


So it's time to import..

Again write and run this below code.
 class Example_Job_XMLimport  
 {      
   public static void main(Args _args)  
   {  
     FileUploadTemporaryStorageResult result;  
     str               xml;  
     XmlDocument xmlDocument;  
     XmlNodeList xmlRecords;  
     XmlNode          xmlRecord;  
     XmlNode          tableName;  
     XmlNodeList xmlFields;  
     XmlNode          xmlField;  
     XmlNode          xmlFieldName;  
     XmlNode          xmlFieldValue;  
     BinData          binData;  
     container     binDataCon;  
     DictTable           dictTable;  
     common                record;  
     Map                     mapTables = new Map(Types::String,Types::Integer);  
     SysDataTableCtrl sysDataTableCtrl;  
     void initRecord(str _tableName)  
     {  
       ;  
       dictTable = new DictTable(tableName2Id(_tableName));  
       if(dictTable != null)  
       {  
         record = dictTable.makeRecord();  
         record.clear();  
         // if not yet in the map, then delete records  
         if(!mapTables.exists(_tableName))  
         {  
           sysDataTableCtrl = new SysDataTableCtrl(dictTable);  
           sysDataTableCtrl.deleteTable();  
         }  
         // keep table name in the map  
         mapTables.insert(_tableName, 0);  
       }  
     }  
     void setFieldValue(str _fieldName, str _fieldValue)  
     {  
       int           fieldId = fieldName2Id(dictTable.id(), _fieldName);  
       DictField dictField;  
       ;  
       if(fieldId==0)  
         return;  
       dictField = dictTable.fieldObject(fieldId);  
       if(!dictField)  
         return;  
       if(dictField.isSystem())  
         return;  
       switch(dictField.baseType())  
       {  
         case Types::String:  
         case Types::VarString:  
           record.(fieldId) = _fieldValue;  
           break;  
         case Types::Integer:  
           record.(fieldId) = str2int(_fieldValue);  
           break;  
         case Types::Int64:  
           record.(fieldId) = str2int64(_fieldValue);  
           break;  
         case Types::Real:  
           record.(fieldId) = str2num(_fieldValue);  
           break;  
         case Types::Date:  
           record.(fieldId) = str2date(_fieldValue, 123);  
           break;  
         case Types::Enum:  
           record.(fieldId) = str2int(_fieldValue);  
           break;  
         case Types::Guid:  
           record.(fieldId) = str2guid(_fieldValue);  
           break;  
         case Types::Container:  
           break;  
         case Types::UtcDateTime:  
           record.(fieldId) = str2datetime(_fieldValue, 123);  
           break;  
         default:  
           info(strFmt('Type %1 not imported', dictField.baseType()));  
           break;  
       }  
     }  
     void insertRecord()  
     {  
       record.insert();  
     }  
     ;  
     result = File::GetFileFromUser(classStr(FileUploadTemporaryStorageStrategy));  
 
     if(result && result.getUploadStatus())  
     {  
       using(System.IO.MemoryStream stream = result.openResult() as System.IO.MemoryStream)  
         using(System.IO.StreamReader sreader = new System.IO.StreamReader(stream, System.Text.Encoding::UTF8, true))  
       {  
         xml = sreader.ReadToEnd();  
       }  
       // process file content  
       xmlDocument = new XmlDocument();  
       xmlDocument.loadXml(xml);  
       info(xmlDocument.root().name());  
       xmlRecords = xmlDocument.root().childNodes();  
       xmlRecord = xmlRecords.nextNode();  
       while(xmlRecord)  
       {  
         ttsbegin;  
         tableName = xmlRecord.attributes().getNamedItem('table');  
         initRecord(tableName.value());  
         if(dictTable != null)  
         {  
           xmlFields = xmlRecord.childNodes();  
           xmlField = xmlFields.nextNode();  
           while(xmlField)  
           {  
             xmlFieldName = xmlField.attributes().getNamedItem('name');  
             xmlFieldValue = xmlField.firstChild();  
             binDataCon = BinData::loadFromBase64(xmlFieldValue.value());  
             binData = new BinData();  
             binData.setData(binDataCon);  
             setFieldValue(xmlFieldName.value(), binData.getStrData());  
             xmlField = xmlFields.nextNode();  
           }  
           insertRecord();  
         }  
         ttscommit;  
         xmlRecord = xmlRecords.nextNode();  
       }  
       // inform success  
       info("Parameter is imported.");  
     }  
     // inform if upload failed  
     else  
     {  
       error("Upload failed");  
     }  
   }  
 }  


When running


You will see that by this way you can move data across ax environment very easy!

Until the next post!

X++ | d365FO - import and export data via XML (Part 1 - Export)

This post shows how to move data via XML. I found it very useful as ax consultants or developers often need to move the data (mostly parameters) from system to system.

Scenario
We would like to 'copy' parameters from dev system to test system. The tables and fields of both systems are identical. We just need to update (sync) the latest parameters on the test system.

Action
To show the example, I create a test table, then insert some data as below.


Write and run this code.
 class Example_Job_XMLexport  
 {      
   public static void main(Args _args)  
   {  
     const str filename          = 'TestTblParm.xml';  
     TextBuffer textBuffer     = new TextBuffer();  
     container tableCon          = [ 'TestTable'//,  
                                              //'Test2Table',  
                                              //'Test3Table',  
                                          ];  
     int            tableIdx,  
                       fieldIdx;  
     DictTable dictTable;  
     DictField dictField;  
     common   record;  
     BinData  binData;  
     str            fileContentStr;  
     void exportFieldValue(int _fieldId)  
     {  
       str fieldName = fieldId2Name(record.TableId, _fieldId);  
       str fieldValue;  
       ;  
       textBuffer.appendText('<field name="' + fieldName + '"><![CDATA[');  
       dictField = dictTable.fieldObject(_fieldId);  
       switch(dictField.baseType())  
       {  
         case Types::VarString:  
         case Types::String:  
           fieldValue = record.(_fieldId);  
           break;  
         case Types::Integer:  
         case Types::Int64:  
         case Types::Real:  
           fieldValue = strFmt('%1', record.(_fieldId));  
           break;  
         case Types::Date:  
           fieldValue = date2str(record.(_fieldId),123,1,1,1,1,1);  
           break;  
         case Types::Enum:  
           fieldValue = int2str(record.(_fieldId));  
           break;  
         case Types::Guid:  
           fieldValue = guid2str(record.(_fieldId));  
           break;  
         case Types::Container:  
           break;  
         case Types::UtcDateTime:  
           fieldValue = datetime2str(record.(_fieldId));  
           break;  
         default:  
           info(strFmt('Type %1 not exported', dictField.baseType()));  
           break;  
       }  
       binData = new BinData();  
       binData.setStrData(fieldValue);  
       textBuffer.appendText(binData.base64Encode());  
       textBuffer.appendText(']]></field>');  
     }  
     ;  
           // Start writing textBuffer  
     textBuffer.appendText('<data>');  
           // Loop through list of desired table  
     for(tableIdx = 1; tableIdx <= conLen(tableCon); tableIdx++)  
     {  
       dictTable = new DictTable(tableName2Id(conPeek(tableCon, tableIdx)));  
       record = dictTable.makeRecord();  
       while select record  
       {  
         textBuffer.appendText('<record table="'+ dictTable.name() +'">');  
         for(fieldIdx = 1; fieldIdx <= dictTable.fieldCnt(); fieldIdx++)  
         {  
           exportFieldValue(dictTable.fieldCnt2Id(fieldIdx));  
         }  
         textBuffer.appendText('</record>');  
       }  
     }  
           // End writing textBuffer  
     textBuffer.appendText('</data>');  
           // Set string  
     fileContentStr = textBuffer.getText();  
           // Export file  
     File::SendStringAsFileToUser(fileContentStr,  
                                         filename,  
                    System.Text.Encoding::UTF8,  
                                         classstr (FileUploadTemporaryStorageStrategy));  
     info('parameters exported');  
   }  
 }  

Then you get the result a XML file which contains the encoded content.


In the next post, we will see how to import this XML file.

X++ | d365FO - import and export csv file (Part 2 - Import)

I researched and found many interesting csv posts, then I rewrite it to keep it here in this blog. You will find all references at the bottom.

From the part 1 https://shootax.blogspot.com/2018/11/x-d365fo-import-and-export-csv-file.html, here the scenario is still simple. We will import that csv file and display the data.


Solution


class Example_Job_CSVimport
{        
    public static void main(Args _args)
    {  
        FileUploadTemporaryStorageResult importFile;
        container record;

        importFile = File::GetFileFromUser(classStr(FileUploadTemporaryStorageStrategy));

        if(importFile && importFile.getUploadStatus())
        {
            CommaStreamIo io = CommaStreamIo::constructForRead(importFile.openResult());

            if (io)
            {
if (io.status())
throw error('@SYS52680');

                io.inFieldDelimiter(',');
                io.inRecordDelimiter('\r\n');
}

while (!io.status())
            {
                record = io.read();
if (conLen(record))
                {
                    info(strFmt("%1 - %2", 
conPeek(record, 1),
                                conPeek(record, 2)));
}
}
        }

    }


}


When running


Explanation

These below are the types/classes we used to transfer data.

File --> CommaStreamIO --> Container


I hope the example is simple and let you see the idea behind. Don't forget to check the original post if you need to know more details about it. Until the next post!

Ref: http://axrachit.blogspot.com/2017/02/x-code-to-read-csv-files-in-dynamics.html

X++ | d365FO - import and export csv file (Part 1 - Export)

I researched and found many interesting csv posts, then I rewrite it to keep it here in this blog. You will find all references at the bottom.

So the scenario is very simple. Here we would like to read data from a table and export it to a csv file.


Solution


class Example_Job_CSVexport
{        
    public static void main(Args _args)
    {  
        CommaStreamIo io = CommaStreamIo::constructForWrite();
        str   fileName = 'Cust_DE.csv',
  fileContent;
        CustTable   custTable;

// Write header
        io.writeExp(['Customer', 'Account number', 'Currency', 'DataAreaId']);

// Write line
while select custTable
  where custTable.DataAreaId == 'DEMF'
{
io.writeExp([custTable.name(),
custTable.AccountNum,
custTable.Currency,
custTable.DataAreaId]);
}

// Set stream
        System.IO.Stream stream = io.getStream();
        stream.Position = 0;

// Set stream reader
        System.IO.StreamReader sReader = new System.IO.StreamReader(stream);

// Set file contentn string
        fileContent = sReader.ReadToEnd();

// Save file
        File::SendStringAsFileToUser(fileContent, fileName);
    }

}


When running


Explanation

These below are the types/classes we used to transfer data.

Table --> CommaStreamIO --> Stream --> StreamReader --> String ---> File


You will also note that we can use other IO classes as well.


Original source of above figure http://axrachit.blogspot.com/2017/02/x-code-to-read-csv-files-in-dynamics.html


In the next post, we will see how to import this csv back to d365FO.

Ref: https://dynamics365foroperation.blogspot.com/2018/02/create-csv-file-and-save-it.html


Thursday, October 18, 2018

d365FO - copy data from a table to another table

Hi, I found this post Rahul's AX Blog copy-data-from-one-table-to-another is very useful, so I just keep it here.

The scenario is you have table AAA, and then duplicate a new table CopyAAA. Then you would like to copy the data records across them.

The code is written as d365FO job. However it works on ax 2012, 2009 and 4.0 as well.

class CopyAcrossTable
{        

    public static void main(Args _args)
    {   
        void buf2buf(Common  _from, Common  _to)
        {
            DictTable   dictTableFrom   = new DictTable(_from.TableId);
            DictTable   dictTableTo     = new DictTable(_to.TableId);
            DictField   dictFieldFrom;
            FieldId     fieldIdFrom     = dictTableFrom.fieldNext(0);
            FieldId     fieldIdTo
;


            while (fieldIdFrom && ! isSysId(fieldIdFrom))
            {
                dictFieldFrom   = new DictField(_from.TableId, fieldIdFrom);


                if(dictFieldFrom)
                {
                    fieldIdTo = dictTableTo.fieldName2Id(dictFieldFrom.name());


                    if(fieldIdTo)
_to.(fieldIdTo) = _from.(fieldIdFrom);
                }


                fieldIdFrom = dictTableFrom.fieldNext(fieldIdFrom);
            }
        }

        AAA aaa;
        CopyAAA copyAAA;
        ;
  
        while select aaa
        {
            buf2Buf(aaa, copyAAA);
            copyAAA.insert();
        }

        info("Copy done!");

    }

}


Until the next post!


Thursday, August 23, 2018

d365FO - how to change model layer

In d365FO, once a model was already created, the layer is NOT able to changed. However there is a simple trick to do that. The following example shows how to change model layer from USR to ISV.

1. Stop AOS service in IIS
2. Edit C:\AOSService\PackagesLocalDirectory\yourModel\Descriptor\yourModel.xml

        from
<Layer>14</Layer>

        to
<Layer>8</Layer>

3. Edit the VS solution file, for example C:\users\aaa\yourModel\yourModel.sln

        Change below USR to ISV

        MinimumVisualStudioVersion = 10.0.40219.1
        Project("{FC65038C-1B2F-41E1-A629-BED71D161FFF}") = "yourModel (USR) [Funny company]", "yourModel\yourModel.rnrproj", "{3F0DF531-7E6A-47A7-8230-B22D299794C5}"
EndProject

4. Start AOS service in IIS

5. Launch VS and build the model again to verify the change.

That's all!


Ref:
Alex Kwitny's comment https://stackoverflow.com/questions/42513406/how-can-i-change-the-layer-from-usr-to-isv-in-dynamics-365-for-operation

Wednesday, August 22, 2018

d365FO | Idea to connect d365FO projects with source control (VSTS)

 For a simple scenario, a developer has only onebox (one AOS) and will develop many projects for a company. And need to plug all projects to source control.


The main reason for this topology is an AOS environment can be occupied by only one source control. (In this case, AOS environment means C:\AOSService\PackagesLocalDirectory) So you need 1 LCS project and 1 VSTS organization and 1 VSTS project.

In the VSTS project, you can create a couple of folders that correspond to 1 VS solution. Such idea would be able to handle whole AOS and all d365FO projects.

Until the next post!

d365FO - How to unbind or disconnect d365FO projects from source control (VSTS)

Sometimes, you probably need to re-organize the projects and source control. One of the task is to disconnect d365FO objects from source control.

(VSTS stands for Visual Studio Team Services)

Here, the steps.
1. Backup your files and metadata
2. Unbind
3. Remove mapping
4. Remove VSTS connection in VS
5. Remove Workspace in VS
6. Remove the VSTS project binding in LCS project
7. Remove a VSTS project in VSTS organizations
8. Remove a VSTS organization
9. Remove a LCS project


1. Backup your files and metadata
        a. d365FO projects and model - These can be backup by export axpp projects
        b. VS files and folder - Solution, project and related folders
        c. d365FO model metadata - For example, C:\AOSService\PackagesLocalDirectory\XXXmodel

2. Unbind
This is for unbind/disconnect the local artifacts from the source control (VSTS)


After finish this step, you should check the availability of the VS local files and folders.

3. Remove mapping

**You do this step if you don’t want to keep configuration between local machine and VSTS to re-bind it in the near future.

**Normally, make sure you finish unbind step before, unless the some of local files might be removed.


**Since step 4. It's optional. You probably do it all or just some steps on your need.

4. Remove VSTS connection in VS
5. Remove Workspace in VS


6. Remove the VSTS project binding in LCS project


7. Remove a VSTS project in VSTS organizations


8. Remove a VSTS organization


9. Remove a LCS project


Until the next post! ;-)


Ref:
https://support.smartbear.com/testcomplete/docs/working-with/integration/scc/tfvc/common-tasks/unbinding.html